Save
Save Something about the lively fizz and the sharp, tangy punch of homemade fermented hot sauce always takes me back to the simple curiosity that started it all. On an especially grey afternoon, I looked at a neglected basket of chili peppers and thought, What if I tried to capture their fire for the gloomy days ahead? I still remember the first waft of fermenting peppers—a surprisingly pleasant, almost fruity aroma that filled my kitchen by the third day. Even the gentle bubbling noise from the jar, subtle but persistent, became its own little soundtrack for the week. Making this sauce is part science project, part culinary adventure, and entirely worth it.
One rainy Sunday, I opened a fresh batch just as friends trickled in for an impromptu taco night. The look of surprise after their first drizzle—raising eyebrows, a quiet heat building—sparked the best conversation of the evening. Suddenly, everyone was experimenting: splashing the sauce over eggs, whisking it into dressings, sneaking it onto everything in sight. Watching a homemade ferment so deliberately passed around made me appreciate how a little effort can bring so much togetherness. Hot sauce night quickly became a recurring event, with each batch sparking new debates about the perfect pepper combo.
Ingredients
- Fresh red chili peppers (300 g): Feel free to mix and match chilies; I once realized Fresno and jalapeño together create nuanced heat and color.
- Red bell pepper (1 small): Adds both natural sweetness and extra body, which balances the sharper chilies.
- Garlic cloves (4): Fermentation mellows their intensity, creating a deep umami note—don’t skip them.
- Shallot or onion (1 small or 1/2 small): Either option brings that subtle sharpness that rounds out the hot sauce.
- Carrot (1 medium, optional): Adds earthy sweetness and a creamy thickness, especially if you prefer a softer burn.
- Filtered water (500 ml): Avoid tap water; chlorine can disrupt fermentation and dull the flavors.
- Non-iodized salt (15 g): Using sea or kosher salt keeps the ferment clean—I learned the hard way not to use table salt with additives.
- Apple cider vinegar (2 tbsp): This finishing touch brightens the finished sauce and preserves it; substitute for rice vinegar if you like things milder.
Tired of Takeout? 🥡
Get 10 meals you can make faster than delivery arrives. Seriously.
One email. No spam. Unsubscribe anytime.
Instructions
- Salt & dissolve:
- In a measuring jug, swirl salt into the filtered water, listening for the last grains to vanish—it should taste just faintly salty.
- Chop & prep:
- Cut your chilies, bell pepper, carrot, garlic, and shallot without worrying about perfection; rustic is the goal and the kitchen will quickly smell sweet, peppery, and bright.
- Fill the jar:
- Layer all your prepped veggies and aromatics into a clean glass jar, making sure to pack them gently so brine can flow around them.
- Submerge fully:
- Pour brine to cover; press everything under with a weight or bag—every bit needs to stay underwater to avoid mold.
- Seal & let it bubble:
- Loosely cover with a lid or fit an airlock; over the next week, you’ll hear gentle fizz and watch the brine turn from clear to vibrant red-gold.
- Wait & check:
- Set the jar somewhere dark and not too warm; peek daily to ensure veggies stay submerged, and skim off any signs of mold or cloudiness on top.
- Blend to finish:
- Dump everything (brine too) into a blender after 7 days; pour in vinegar and blitz until creamy and fiery—add more brine if you prefer it pourable.
- Strain or leave rustic:
- For a silky hot sauce, strain through a fine mesh sieve; or skip this step for heaps of character and a chunkier texture.
- Bottle up:
- Carefully transfer the finished sauce to a sterilized bottle or jar and stash in the fridge, where the flavors will keep evolving for months.
 Save
Save Sometime last summer, a neighbor dropped by after smelling something unexpectedly tangy drifting from my open window. We ended up trading a jar of my sauce for some of her sourdough starter, and I realized just how much fermenting brings people together. That hum of kitchen sharing and swapping felt like the true magic behind this simple jar of swirling reds and golds.
Fermentation Wisdom from My Kitchen
If your first worry is the smell, don’t fret—fermentation’s aroma can be strong, but it’s more fruity than foul when things are going right. A bubbly, slightly fizzy brine means you’re on the right path, and tiny bubbles along the jar’s sides were my sign to stay patient. No two batches ever taste quite the same, and jotting down your pepper combinations makes future experiments even better. Sometimes the sauce mellowed beautifully after just a week, while other times, the heat kept building a day or two late. That’s the fun part: each jar has its own personality.
Adjusting the Heat and Flavor
The real surprise came when I started swapping out peppers each time—I snuck in habaneros for mega heat or stuck with jalapeños for a gentler burn. More vinegar at the end will sharpen the tang, while extra brine softened the spicy edge and made the sauce drizzle more easily. Seasonings—like a few black peppercorns or coriander seeds tossed into the brine—were my secret trick for an aromatic layer. Once, I even stirred in a spoonful of honey before blending for a unique twist. Don’t be afraid to experiment until you discover your signature blend.
Storage, Sharing, and Serving Ideas
Don’t let your beautiful sauce languish at the back of the fridge: pour it over roasted veggies, eggs, or toss a teaspoon into your favorite vinaigrette for a spirited salad dressing. Small bottles make perfect gifts, and nothing lights up a breakfast table like a homemade hot sauce lineup. Every now and then, I taste a batch next to store-bought—it’s always shocking how complex and alive homemade hot sauce feels in comparison.
- If separating occurs, give the bottle a good shake before serving.
- Your sauce’s flavor will keep evolving in the fridge—it only gets better with time.
- Always use a clean spoon to avoid introducing unwanted microbes.
 Save
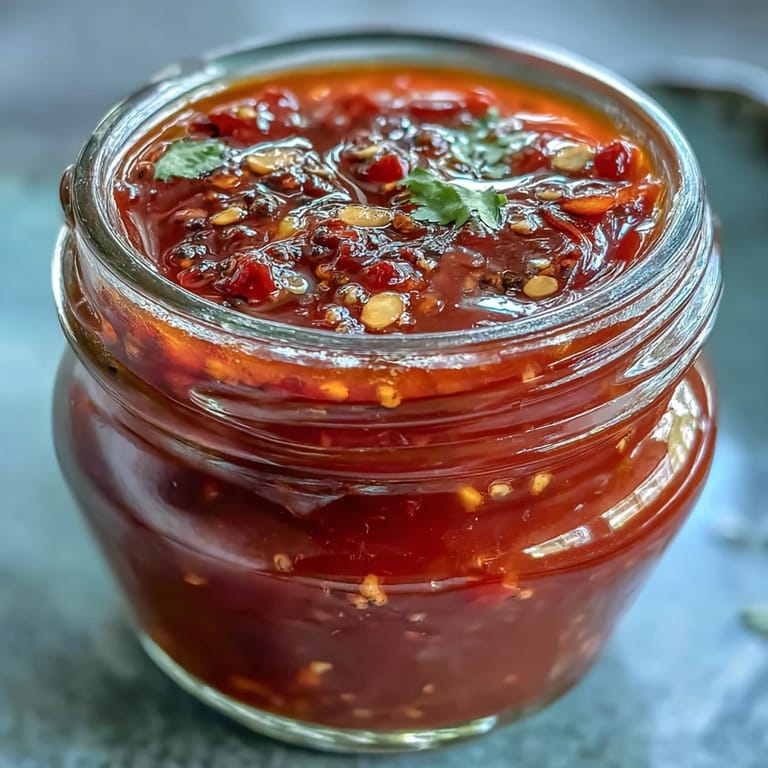
Save Bottling up a batch of this homemade fermented hot sauce always feels like capturing a spark in a jar. Have fun experimenting—it’s a flavor adventure with every pour.
Recipe FAQs
- → How long should the vegetables ferment?
Ferment at 18–22°C (65–72°F) for about seven days for a lively lacto-ferment. Check daily to ensure produce stays submerged and remove any surface scum; longer fermentation yields more acidity and complexity.
- → How can I adjust the heat level?
Choose milder chilies like Fresno or red jalapeño for moderate heat, add hotter varieties (habanero, Thai) for more kick, or include more bell pepper and carrot to temper the spice. Removing seeds and membranes reduces heat too.
- → What salt concentration should I use for the brine?
The guideline here is about 15 g salt to 500 ml water, roughly a 3% brine. Use non-iodized salt (sea or kosher) to encourage healthy fermentation and prevent off-flavors.
- → Can I substitute the vinegar used after blending?
Yes. Apple cider vinegar gives fruitier tang, distilled white vinegar is neutral, and rice vinegar yields a milder acidity. Add vinegar to taste to balance brightness and preserve the sauce.
- → Should I strain the sauce before bottling?
Straining through a fine-mesh sieve creates a smooth sauce; leaving it unstrained preserves texture and body. Both approaches are fine—adjust based on mouthfeel preference.
- → How should I store the finished sauce and how long does it keep?
Transfer to sterilized bottles or jars and refrigerate. The sauce keeps up to three months chilled; flavor will continue to mellow and develop over time.