 Save
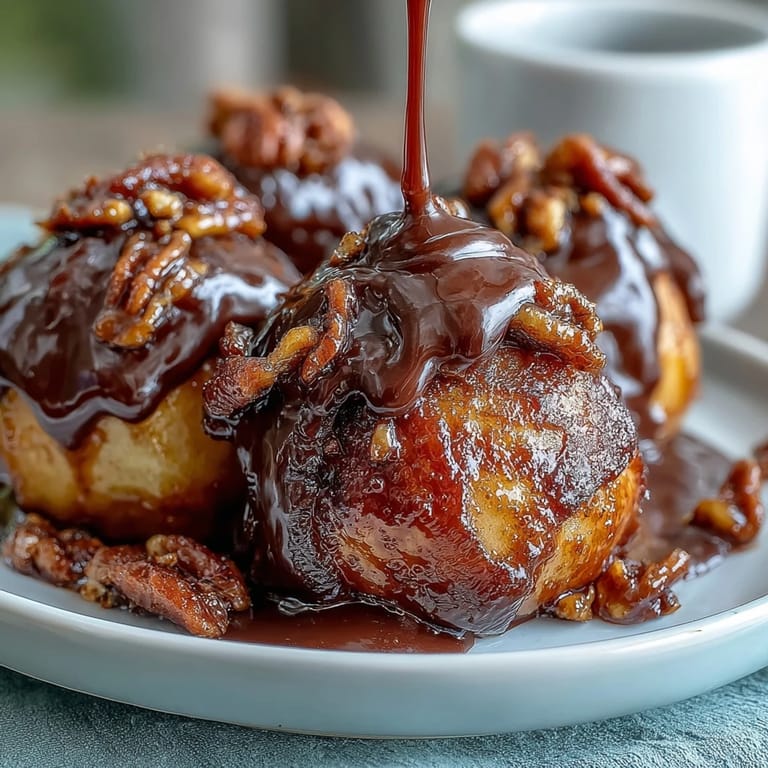
Save My neighbor showed up at my door one autumn afternoon with a bag of caramel candies she'd accidentally bought three boxes of, and within minutes we were melting them over apple slices in my kitchen. The smell that rose from the pan—buttery, sweet, almost nostalgic—made us both pause. I grabbed some dark chocolate from the pantry, and what started as a casual experiment became something we couldn't stop eating. Now whenever I make these, I think of that unexpected afternoon and how the simplest ingredients can feel like a small celebration.
I made these for a small dinner party last November, and something magical happened when I served them on a slate board with the chocolate still slightly glossy. A friend who claims she never wants dessert asked for a second one, then a third. That's when I realized these aren't just candy apples—they're the kind of bite-sized treat that feels fancy but tastes like unapologetic comfort food.
Ingredients
- Crisp apples (Granny Smith or Honeycrisp), 2 large, cored and sliced into 6 wedges each: The variety matters here because you want that firm flesh that won't turn mushy, and the tartness balances the sweetness perfectly.
- Lemon juice, 1 tablespoon: This is your insurance policy against the browning that happens so quickly once you cut an apple, and it adds a whisper of brightness that nobody will taste but everyone will feel.
- Soft caramel candies, 1/2 cup (about 120 g), unwrapped: Using candies instead of making caramel from scratch is honest and practical—the melting temperature is already predictable, and the flavor is reliably good.
- Heavy cream, 2 tablespoons: This loosens the caramel to the right consistency for dipping and creates that silky coating that clings to the apple.
- Dark chocolate (60–70% cocoa), 85 g (3 oz), chopped: The cocoa percentage is crucial because anything darker feels bitter against the sweetness, and anything lighter loses that sophisticated edge.
- Coconut oil or unsalted butter, 1 teaspoon: This thins the chocolate just enough to drizzle smoothly without changing its flavor, and it sets faster than pure chocolate would.
- Chopped toasted nuts, 2 tablespoons (optional): Pecans or almonds add a textural contrast that makes each bite more interesting, and toasting them first wakes up their natural oils.
- Colorful sprinkles, 2 tablespoons (optional): These are purely for the joy they bring—go for quality ones that taste like something other than wax.
- Flaky sea salt, to taste (optional): Just a tiny pinch transforms the whole thing by making the caramel taste more caramel-like and the chocolate feel less heavy.
Tired of Takeout? 🥡
Get 10 meals you can make faster than delivery arrives. Seriously.
One email. No spam. Unsubscribe anytime.
Instructions
- Get your workspace ready:
- Line a baking sheet with parchment paper so nothing sticks, and keep it within arm's reach for when you're dipping. This takes two minutes but saves you from that frantic scrambling later.
- Prepare the apples:
- Toss your sliced apples with the lemon juice and pat them dry with paper towels—this step feels small, but damp apples won't let the caramel stick properly. Once they're dry, poke a popsicle stick or sturdy skewer into each slice for easy handling.
- Melt the caramel:
- In a small saucepan over low heat, let those caramel candies surrender to the warmth while you stir in the heavy cream, watching the mixture transform from chunky to glossy and smooth. Let it cool for a few minutes so you don't burn yourself, but don't let it sit so long that it hardens again.
- Dip the apples:
- Hold each apple slice by its stick and dip it halfway into the caramel, letting the excess fall back into the pan with a little shake. Place it on the parchment, and don't overcrowd—they need their own space to set.
- Let the caramel set:
- Slide the tray into the refrigerator for about five minutes, and use this time to chop your chocolate and get your microwave ready.
- Melt the chocolate:
- Combine your chopped chocolate and coconut oil in a microwave-safe bowl and heat in twenty-second bursts, stirring between each one, until you have that glossy, pourable consistency. Patience here prevents seizing, which is the chocolate equivalent of disaster.
- Drizzle with intention:
- Use a spoon or small piping bag to drizzle chocolate over the caramel-coated apple slices in whatever pattern appeals to you—loose lines, delicate zigzags, whatever feels right. If you want to add nuts, sprinkles, or salt, do it immediately while the chocolate is still slightly warm and sticky.
- Final chill and serve:
- Refrigerate for another five to ten minutes so the chocolate firms up, then serve them however makes you happiest—straight from the cold or at room temperature, depending on your mood.
 Save
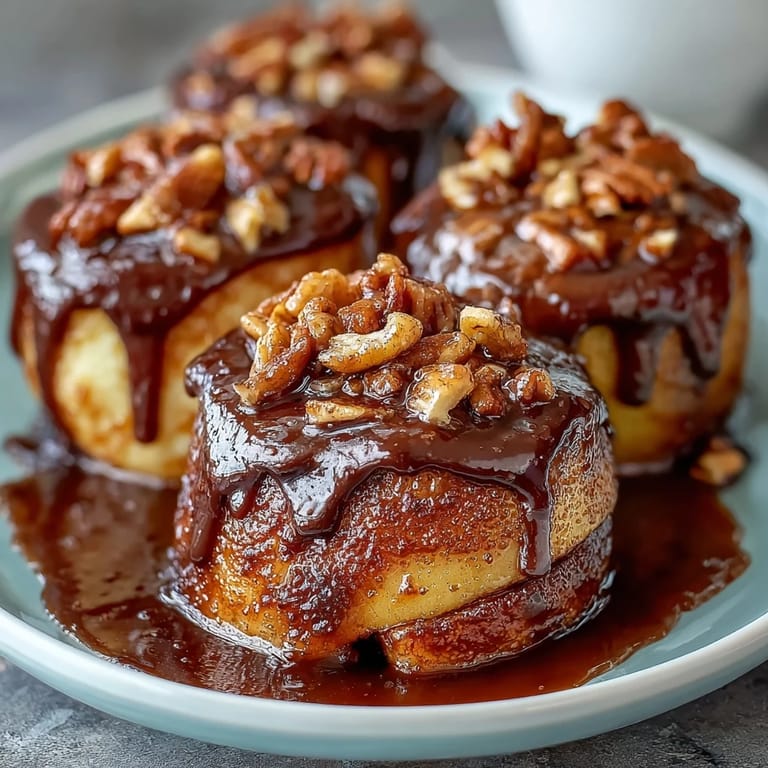
Save There's something about watching someone's face light up when they bite into one of these and discover that perfect moment where the crispness of the apple, the yielding sweetness of the caramel, and the slightly bitter chocolate all dance together on their tongue. That's the moment I remember why I bother with the little details.
On Choosing Your Apples
The apple is doing the heavy lifting here, and a mealy or soft one will drag the whole thing down. Granny Smiths are the reliable choice because they're dependably tart and firm, but Honeycrisp apples work beautifully too if you want something sweeter and crisper. The test is simple: if you cut a slice and it feels sturdy rather than limp, you've made the right call.
The Caramel Question
I know it might seem lazy to use candies instead of making caramel from scratch, but I stopped apologizing for this choice years ago when I realized that what matters is the result, not proving something in the process. The candies melt reliably, they taste legitimately good, and they let you focus on the dipping and decorating, which are the parts that actually matter. If you want to make your own caramel, absolutely do it—just let it cool to about 250°F before dipping.
Timing and Temperature Matter
The dance between the caramel and chocolate setting is what creates those beautiful, defined layers, so don't skip the chill times even though they feel unnecessary. Once everything is set, these hold well for a day or two in an airtight container in the refrigerator, though they taste best served just a few hours after assembly.
- Keep your caramel at a pourable consistency by reheating gently if it thickens between dips, stirring constantly so it doesn't burn.
- The chocolate drizzle sets faster if your apples are cold from the fridge, so plan accordingly and work relatively quickly once you start drizzling.
- If you're adding garnishes, do it while the chocolate is still slightly tacky—it's the glue that holds everything where you want it.
 Save
Save These candy apple slices live in that wonderful space between homemade and effortless, where everyone thinks you fussed over them far more than you actually did. Make them when you want something that feels special but doesn't require the kind of stress that takes the joy out of cooking.
Recipe FAQs
- → What type of apples work best for this treat?
Crisp apples like Granny Smith or Honeycrisp are ideal for maintaining a firm texture and balanced tartness.
- → How can I prevent the apple slices from browning?
Tossing the slices in lemon juice before preparing helps keep them fresh and prevents discoloration.
- → Can I substitute dark chocolate with another variety?
Yes, white or milk chocolate can be used to create a sweeter coating if preferred.
- → Is it possible to make nut-free versions?
Simply omit the nuts or swap them with seeds like pumpkin or sunflower for a nut-free option.
- → How should these be served for best taste?
They are best enjoyed chilled or at room temperature to preserve the crisp texture and smooth coatings.
- → What pairs well with this dessert?
Sparking apple cider or a fruity Pinot Noir complement the flavors beautifully.