 Save
Save My nephew called me three weeks before his graduation, voice crackling with excitement through the phone, asking if I could make something special for his party. When he said he wanted a cake that looked as elegant as it tasted, I knew exactly what to do—a vanilla sponge with gold foil that catches the light just right, the kind of cake that makes people pause before cutting into it. There's something about baking for milestones that shifts the whole experience; suddenly you're not just mixing flour and butter, you're creating an edible memory of a moment that only happens once.
I still remember the afternoon I baked this for my nephew's party—my kitchen turned into a miniature celebration before the actual event, with the smell of vanilla filling every corner. Watching him blow out candles over a cake I'd spent hours perfecting, seeing his friends light up when they noticed the gold accents, that's when I understood why people make cakes like this. It wasn't about the technical skill; it was about showing up for someone's important day with butter, eggs, and intention.
Ingredients
- All-purpose flour (2 ½ cups): Use fresh flour from a sealed bag; old flour loses its leavening power and your cake won't rise as beautifully.
- Baking powder (2 ½ tsp): This is what gives the cake its tender, cloud-like crumb; don't skip it or reduce it.
- Salt (½ tsp): Even in a sweet cake, salt deepens vanilla flavor in ways you can't quite identify until it's missing.
- Unsalted butter (1 cup for cake, 1 ½ cups for frosting): Room temperature butter creams properly; cold butter won't incorporate air and your cake will be dense.
- Granulated sugar (2 cups): This sweetens and aerates; beat it with butter for at least 3 minutes to get that fluffy, pale base.
- Eggs (4 large): Room temperature eggs blend smoothly into the batter without creating lumps; cold eggs can curdle the mixture.
- Vanilla extract (1 tbsp plus 2 tsp): Quality vanilla makes a noticeable difference; pure extract tastes better than imitation, especially in something this simple.
- Whole milk (1 cup): Buttermilk can substitute if you like a slightly tangy flavor, but whole milk keeps the cake classically sweet.
- Powdered sugar (5 cups): Sift it before using to avoid lumps in your frosting; lumpy frosting is nearly impossible to spread smoothly.
- Edible gold foil sheets: These are delicate and gorgeous; handle them with tweezers or completely dry hands, never with fingers that have any moisture.
- Diploma topper: Store-bought toppers save time, but homemade fondant versions let you customize colors to match school colors or personal preference.
Tired of Takeout? 🥡
Get 10 meals you can make faster than delivery arrives. Seriously.
One email. No spam. Unsubscribe anytime.
Instructions
- Prepare your pans and preheat:
- Set your oven to 350°F and line two 9-inch cake pans with parchment paper, then grease everything; this prevents sticking and ensures clean cake edges.
- Mix your dry ingredients:
- Whisk flour, baking powder, and salt together in a bowl; this distributes the leavening evenly so your cake rises uniformly.
- Cream butter and sugar:
- Beat them together for 3 to 4 minutes until the mixture is pale, fluffy, and noticeably lighter in color; this aerates the batter and creates a tender crumb.
- Add eggs and vanilla:
- Add eggs one at a time, beating well between each addition so they fully incorporate; add vanilla and beat until combined.
- Alternate wet and dry:
- Add flour mixture and milk in alternating batches, starting and ending with flour; overmixing develops gluten and makes the cake tough, so mix just until combined.
- Divide and bake:
- Pour batter evenly into prepared pans and smooth the tops, then bake for 28 to 32 minutes until a toothpick comes out clean. The kitchen will smell incredible.
- Cool properly:
- Let cakes sit in pans for 10 minutes before turning out onto racks; cooling them completely prevents frosting from melting off.
- Make the frosting:
- Beat softened butter on high speed until pale and creamy (about 3 minutes), then gradually add powdered sugar, vanilla, salt, and milk until smooth and spreadable. Taste it; it should be sweet but not gritty.
- Level and layer:
- Trim cake layers if they're domed, place one layer on your serving plate, and spread a generous layer of frosting on top.
- Crumb coat:
- Apply a thin layer of frosting all over the cake and chill for 30 minutes; this seals in crumbs so your final frosting coat looks pristine.
- Final frosting:
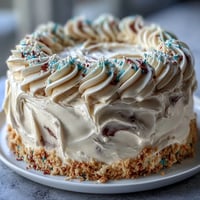
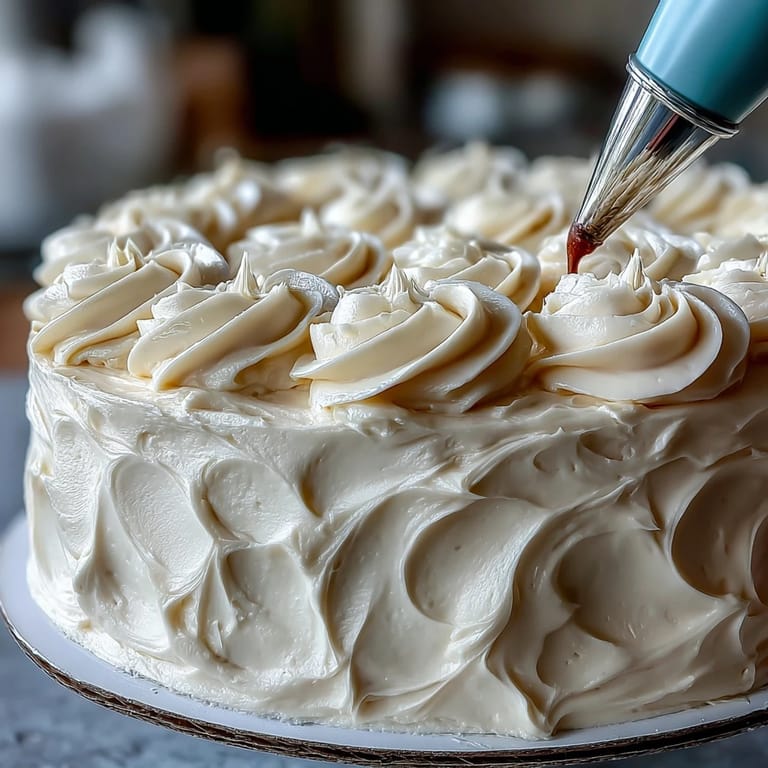
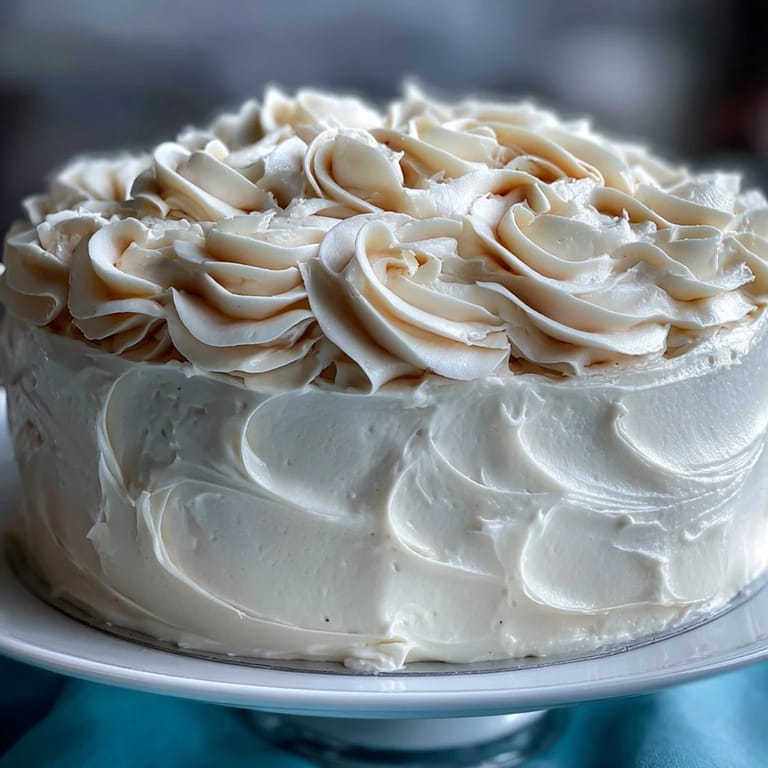
- Frost the chilled cake smoothly with remaining buttercream, using an offset spatula to get clean, even surfaces.
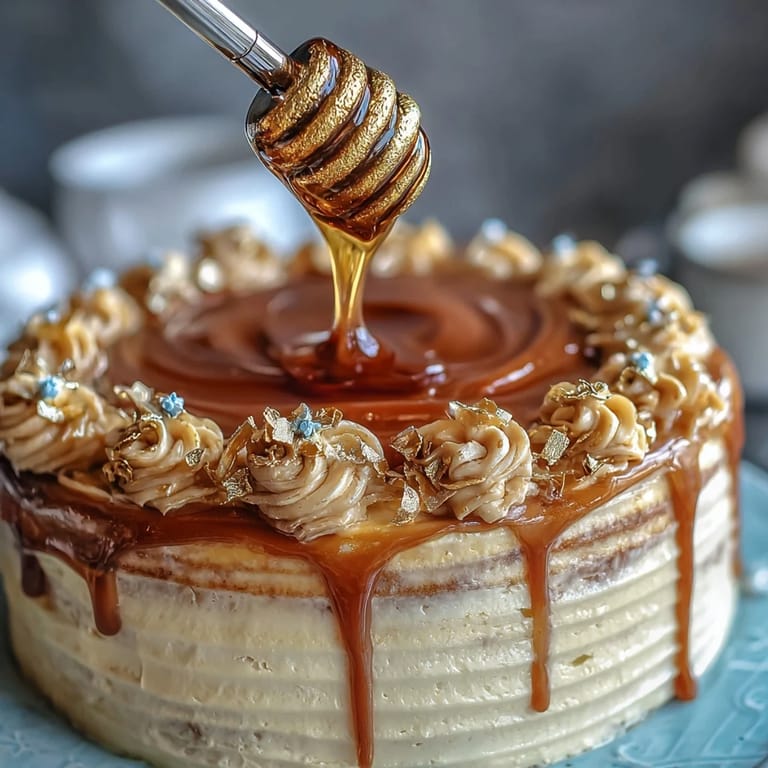
- Add gold foil:
- Using tweezers, carefully apply edible gold foil sheets to areas of the cake; they catch light beautifully and feel luxurious without being overdone.
- Top with diploma and finishing touches:
- Place your diploma topper at the center or side of the cake and add sprinkles or confetti if you'd like extra celebration vibes.
 Save
Save The moment I placed that diploma topper on the finished cake, I felt that familiar warmth that comes from creating something beautiful for someone you care about. My nephew's mom teared up a little when she saw it, which told me everything about whether the effort was worth it.
Customizing for School Colors
If you want this cake to really represent your graduate's school, mix gel food coloring into the buttercream instead of keeping it plain white. Gel colors are potent, so add a tiny amount at a time and mix thoroughly before adding more; you can always make it darker but you can't dilute it once it's too saturated. I've made versions with navy and gold, forest green with silver, and even a deep purple that looked absolutely regal once the edible foil caught the light.
Making a Fondant Diploma from Scratch
Store-bought toppers are convenient, but a homemade fondant diploma feels more personal and lets you control every detail. Roll out white or cream-colored fondant to about ¼ inch thick, cut a diploma shape with a knife or cutter, roll it loosely to look like a scroll, and let it dry for a few hours. Once it's firm, use edible markers to write the graduate's name and year, or leave it blank and elegant—either way, it becomes an edible keepsake they can technically eat if they want to, though most people frame the memory instead.
Storage and Serving Tips
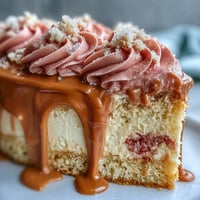
This cake stays fresh in an airtight container at room temperature for two days, or in the refrigerator for up to four days if you need it to last longer. Bring it back to room temperature before serving so the frosting softens and the cake's delicate crumb really shines on your tongue. The gold foil is completely edible but doesn't add flavor, so don't feel obligated to eat every last golden bit if you're just after the cake.
- Champagne or sparkling cider pairs beautifully with vanilla cake and buttercream, making the celebration feel that much more special.
- You can prepare this cake a day ahead; it actually tastes better after flavors have time to settle together overnight.
- If you're nervous about the frosting, practice your technique on a test cake first, or embrace a slightly rustic look—perfect frosting is less important than celebrating the moment.
 Save
Save Baking this cake becomes part of the celebration itself, a quiet way of saying I see this moment matters to you. Every graduation deserves a cake this beautiful, and now you know exactly how to make one.
Recipe FAQs
- → How do I apply the edible gold foil without tearing it?
Use tweezers or clean, dry hands to gently place the gold foil onto the chilled buttercream, handling it delicately to avoid tears.
- → Can I prepare the cake layers in advance?
Yes, you can bake and cool the cake layers ahead of time, wrapping them tightly to keep fresh before assembling and decorating.
- → What is the best way to achieve smooth buttercream frosting?
Chill the crumb-coated cake for at least 30 minutes before applying the final layer to ensure a smooth, even finish.
- → How can I customize the cake colors?
Incorporate gel food coloring into the buttercream to match school or event colors without altering texture.
- → What alternatives can I use for the diploma topper?
Create your own topper using fondant shaped like a diploma and decorated with edible markers, or opt for a store-bought version.