 Save
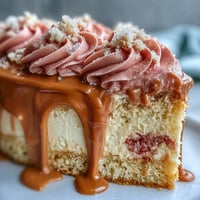
Save My sister called me three weeks before her graduation in a panic—she'd already ordered a sheet cake from the grocery store, but it felt impersonal, generic, like it could've been for anyone's milestone. We hung up, and I found myself sketching a two-tier cake on the back of an envelope, imagining those delicate balloon toppers catching the afternoon light during her garden party. That's when I realized some celebrations demand more than convenience; they demand a little time in the kitchen and the kind of love that only comes from flour under your fingernails.
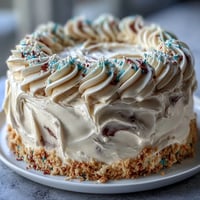
I'll never forget watching my brother help arrange those balloons on top while my sister supervised from a kitchen stool, still in her graduation gown because she couldn't wait. He kept adjusting them slightly to the left, then right, completely serious about the placement, and she laughed so hard she cried. In that moment, the cake stopped being about technique and became a moment we'd all reference for years—that ridiculous perfectionism before we cut into something we'd built together.
Ingredients
- All-purpose flour (4 1/2 cups): This is your structural backbone—make sure it's fresh and not packed down when you measure, or your cake will be denser than intended.
- Baking powder (3 1/2 tsp): Check the date on your container before you start; old baking powder won't give you that light, airy crumb you're counting on.
- Granulated sugar (2 1/2 cups): The sweetness here is balanced so the vanilla really shines without tasting like you're eating frosting straight from the bowl.
- Unsalted butter (1 1/2 cups for cake, 2 cups for frosting): Room temperature is absolutely non-negotiable; cold butter won't cream properly and you'll end up with a grainy batter.
- Large eggs (8 whole): Room temperature means they emulsify better and create a more tender crumb—take them out 30 minutes before you start.
- Vanilla extract (2 tbsp for cake, 2 tbsp for frosting): Splurge on real vanilla here; it's the backbone of the flavor and cheap extract will taste harsh and artificial.
- Whole milk (2 cups for cake, up to 1/2 cup for frosting): The milk keeps the crumb moist and tender without making it greasy, and room temperature milk incorporates smoothly.
- Powdered sugar (8 cups for frosting): Sift it first to remove lumps, or you'll spend time fighting grainy frosting and cursing under your breath.
- Gel food coloring (optional): If you use liquid food coloring, you'll need to add more liquid and throw off your frosting consistency—gel colors don't do that.
- Balloon cake toppers: Buy these ahead of time so you're not stress-shopping the day before the party.
Tired of Takeout? 🥡
Get 10 meals you can make faster than delivery arrives. Seriously.
One email. No spam. Unsubscribe anytime.
Instructions
- Prepare your pans and preheat:
- Set your oven to 350°F and give it time to reach temperature before you pour in any batter. Grease both the 8-inch and 6-inch pans thoroughly, line them with parchment paper, and grease the parchment too—this double protection saves heartbreak when you're trying to turn out a delicate cake.
- Build your dry ingredients:
- Whisk flour, baking powder, and salt together in a medium bowl, breaking up any tiny lumps as you go. This distributes the leavening evenly so every bite of cake has that perfect tender structure.
- Cream butter and sugar into clouds:
- In a large bowl, beat softened butter with sugar for 3 to 5 minutes until the mixture looks pale, fluffy, and almost mousse-like—this is where the magic starts. Scrape down the bowl halfway through because the sugar on the sides gets left behind and creates pockets of graininess in your final cake.
- Add eggs one at a time:
- Drop in an egg, beat it thoroughly, then repeat with the next seven eggs. Each egg needs to be fully incorporated before the next one arrives, or you'll end up with a split, curdled batter that bakes into something dense and unfortunate.
- Mix in vanilla extract:
- Pour in your vanilla and beat until the batter smells incredible—this is your moment to appreciate what you're creating.
- Alternate wet and dry in three parts:
- Start with flour, add it and mix on low speed until just combined, then add milk, mix, then repeat with flour again. Always begin and end with flour so the batter stays emulsified and doesn't break down from too much liquid at the end.
- Divide and fill your pans:
- Split the batter evenly between the four pans—use a kitchen scale if you have one, or eyeball it as carefully as you can. Tap each pan gently on the counter to release trapped air bubbles.
- Bake with intention:
- The 8-inch cakes need 35 to 40 minutes while the 6-inch cakes need 25 to 30 minutes; a toothpick should come out clean with maybe a few moist crumbs. Ovens vary wildly, so start checking at the lower time and trust your judgment over the clock.
- Cool and transfer with care:
- Let cakes rest in their pans for 10 minutes—this allows the structure to set—then invert them onto wire racks to cool completely, about 2 hours. Trying to frost a warm cake is like trying to frost warm butter; it slides around and frustrates you.
- Create your frosting:
- Beat room-temperature butter until creamy, then gradually add sifted powdered sugar while beating, adding milk or cream one tablespoon at a time until you reach a consistency that's spreadable but holds its shape. If you're tinting it, add gel color drop by drop until the shade matches your vision.
- Level your cake layers:
- Use a long serrated knife or cake leveler to trim any domed tops so your layers stack evenly. This step seems fussy but it's the difference between a cake that looks professional and one that tilts like it's been through an earthquake.
- Stack and crumb coat:
- Place one 8-inch layer on your cake board, spread a thin layer of buttercream, then top with the second 8-inch layer; repeat with your 6-inch cakes. Apply a very thin crumb coat of frosting over both cakes and chill for 20 minutes to lock in any crumbs before you apply the final frosting.
- Frost smoothly and stack tiers:
- Use an offset spatula to apply a generous final layer of frosting to both cakes, working in smooth strokes and turning your cake turntable if you have one. Center the 6-inch tier on top of the 8-inch tier, using dowels or straws inserted into the bottom layer for support so the weight doesn't crush everything underneath.
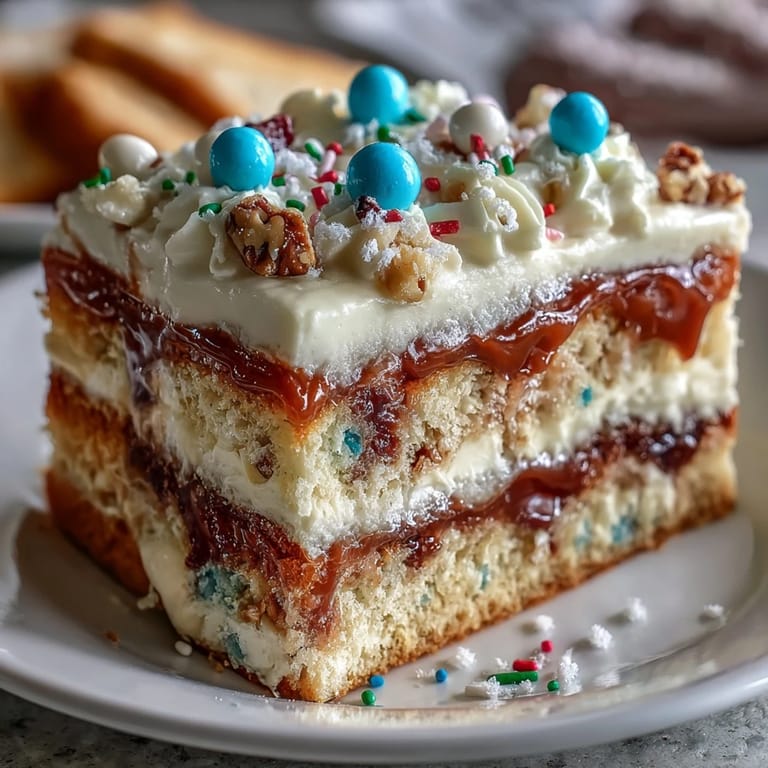
- Decorate and celebrate:
- Insert your balloon toppers, scatter edible confetti if you like, and step back to admire what you've created. This cake is now officially ready to be the star of the show.
 Save
Save The day after my sister's graduation, I found a photo she'd posted: the cake in sunlight with streamers behind it, and the comments were all variations of how elegant and professional it looked. But the best part was her caption: she gave me credit, tagged me, and said something like, 'My sister made this and it was so much better than the cake.' That cake became proof that time spent in the kitchen for someone you love gets remembered in a completely different way than something bought with convenience in mind.
Timing and Make-Ahead Strategy
Bake your cakes the day before the party if you can; they'll actually be easier to handle once they've had time to set, and you'll have one less thing cluttering your day. Frosting can be made several hours ahead and stored in an airtight container at room temperature, which means you can frost in the morning and decorate in the afternoon without the stress of doing everything at once.
If you're really pressed for time, level and crumb coat your cakes the night before, chill them overnight, and finish the final frosting layer and stacking the morning of the party. This rhythm works because you're breaking the work into manageable chunks instead of trying to do everything in one exhausting block.
Flavor Variations and Personal Touches
The vanilla base is deliberately neutral so you can make it your own without any weird flavor conflicts. Add a quarter teaspoon of almond extract to the batter for subtle depth, or whisk a tablespoon of lemon zest into the frosting for brightness that plays beautifully against the sweet vanilla cake.
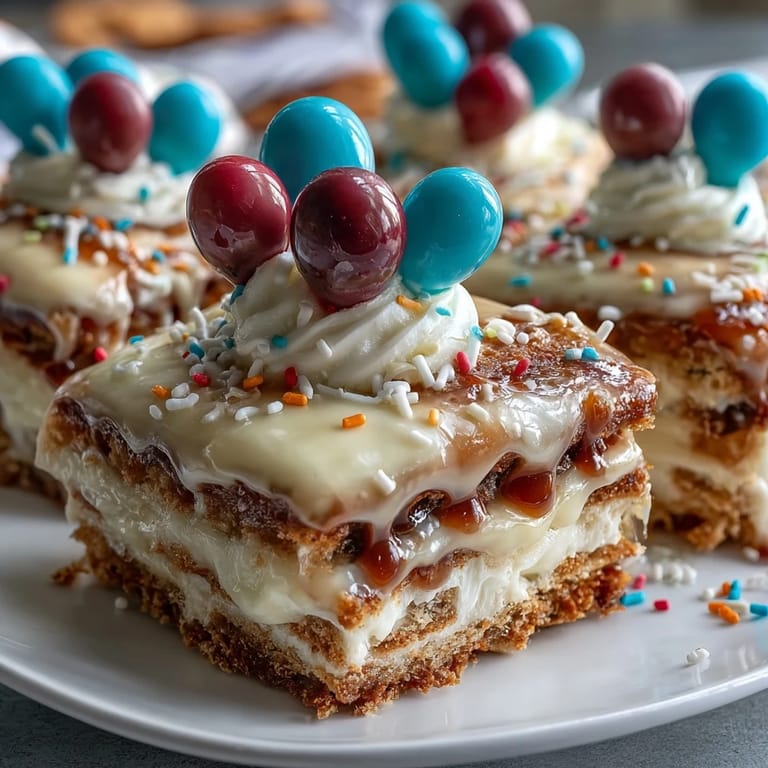
Your graduates' school colors become the frosting color story—use one color for a clean look or swirl two colors together for something more playful and memorable. Edible confetti, fresh flowers, or even a piped message on the frosting turns it from pretty into personalized, which is exactly what makes a celebration feel like it's actually for someone specific.
Troubleshooting and Confidence Builders
If your cake sinks in the middle, your oven temperature is probably running hot or your batter was overmixed before baking; next time, double-check your oven with a thermometer and mix more gently. If your frosting is too soft and won't hold shape, chill it for 10 minutes and beat it again, or if it's too stiff, add milk one teaspoon at a time until it becomes spreadable.
If your frosting breaks or looks grainy, don't panic—start over with a fresh bowl, beat softened butter until creamy, and add the broken frosting very slowly while beating, and it'll come back together. A tilting cake means you either didn't use dowels or your dowels weren't cut flush with the top layer; for next time, measure the height carefully and trim them with a serrated knife.
- Invest in a cake turntable; it's the single best tool for getting a professional finish and makes frosting infinitely easier.
- Take photos during assembly so you remember what you did if someone asks for another cake just like it.
- Keep your frosting slightly thinner than you think it should be when applying it; it will spread more smoothly and give you fewer visible spatula marks.
 Save
Save This cake exists because someone you care about achieved something worth celebrating, and you're taking the time to make that moment special with your hands and your effort. That's the real recipe here—the flour and eggs are just the excuse.
Recipe FAQs
- → How do I ensure the sponge stays moist?
Use room temperature ingredients and avoid overmixing the batter to maintain softness. Proper baking time and cooling are important for moisture retention.
- → What is the best way to level cakes evenly?
Once cooled, use a serrated knife or cake leveler to trim the tops for flat surfaces, ensuring stable stacking.
- → How can I get smooth buttercream frosting?
Beat the butter until creamy before gradually adding powdered sugar. Mix in milk and vanilla slowly and chill crumb-coated layers before final frosting.
- → Can I prepare the cake decorations in advance?
Yes, balloon toppers and edible confetti can be prepared ahead and added just before serving for best appearance.
- → What alternatives can enhance flavor?
Add a touch of lemon or almond extract to the sponge batter for a subtle, complementary flavor boost.