 Save
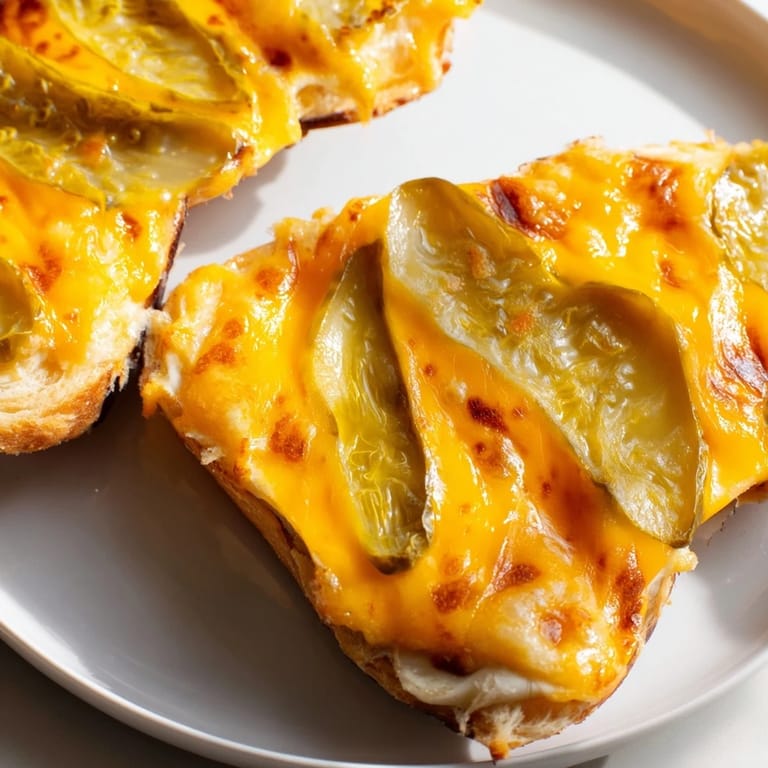
Save I stumbled onto this sandwich completely by accident one afternoon while cleaning out my fridge and staring at a block of sharp cheddar, a jar of pickles, and absolutely nothing resembling bread. The thought hit me suddenly: what if the cheese itself became the bun? Twenty minutes later, I was biting into something crispy, tangy, and so unexpectedly good that I've made it dozens of times since. It's become my go-to when I want something satisfying without the carb crash, and honestly, it tastes more interesting than any traditional sandwich I could assemble.
I made these for my sister last month when she was visiting and mentioned trying to cut back on bread, and watching her face light up when she realized the buns were just melted cheese was worth every minute. She went back for a second sandwich immediately, and that's when I knew this wasn't just a novelty—it was legitimately delicious. Now she texts me the recipe request at least once a week.
Ingredients
- Sharp cheddar cheese slices: Use thick slices, about ¼ inch, because thin ones won't hold up to the pickles or give you that satisfying melt. I learned this the hard way with wimpy deli cheese.
- Sandwich pickle slices: Long dill pickles work best because they cover the cheese evenly and add serious flavor without soaking it all the way through. Pat them dry or they'll release too much moisture.
- Mayonnaise: Optional but it prevents the cheese buns from feeling too dense, and a thin spread makes a real difference in how the whole thing comes together.
- Dijon mustard: Just a teaspoon or two adds a sharpness that plays perfectly off the tangy pickles and rich cheese.
- Tomato slices: If you go this route, pat them dry too, or you'll end up with soggy buns partway through eating.
- Deli turkey or ham: Keep it thin and don't overload it, or the sandwich becomes harder to handle while still warm.
Tired of Takeout? 🥡
Get 10 meals you can make faster than delivery arrives. Seriously.
One email. No spam. Unsubscribe anytime.
Instructions
- Heat your oven and prep your space:
- Get your oven to 400°F and line a baking sheet with parchment or a light spray of nonstick. This keeps the cheese from sticking and makes cleanup effortless.
- Build the pickle layer:
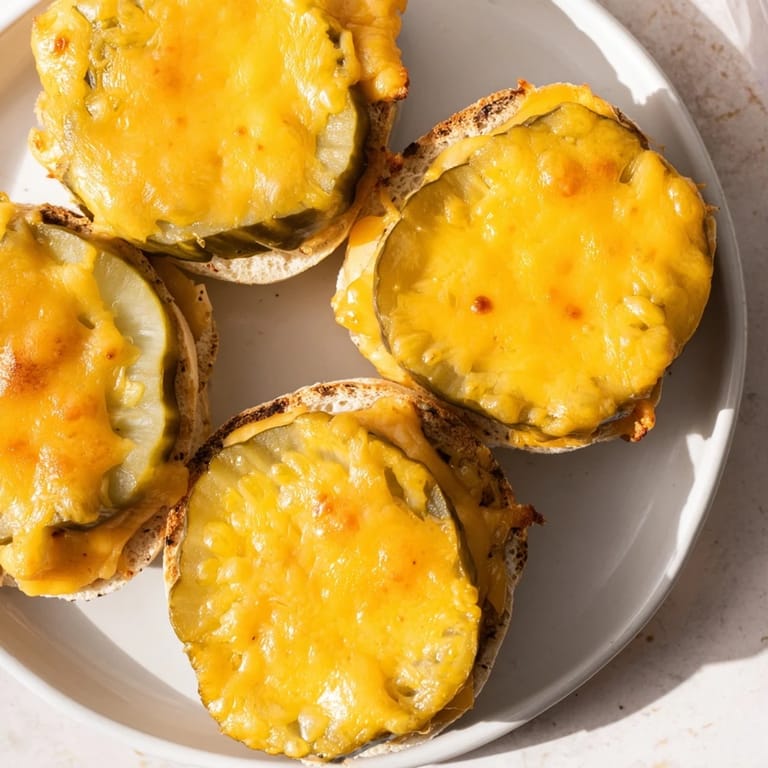
- Lay down your first cheese slice, then arrange pickle slices on top in an overlapping pattern, like you're shingling a roof. This keeps them in place and ensures every bite has that tangy crunch.
- Create the sandwich structure:
- Top each pickle-covered cheese slice with another cheese slice, pressing down gently so everything stays together in the oven. Don't press hard or you'll squeeze out the pickle juice.
- Bake until golden:
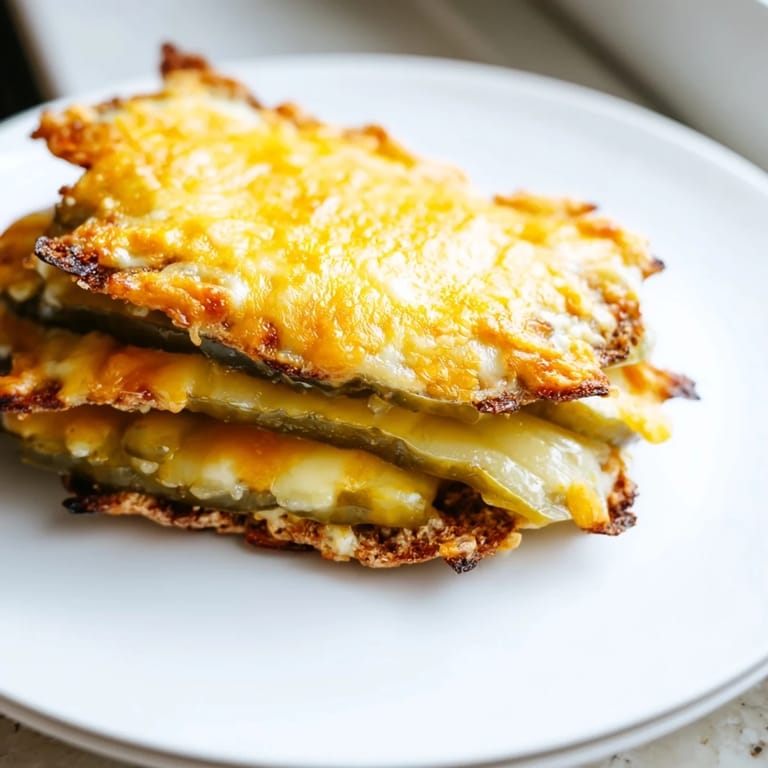
- Pop everything in for 7 to 8 minutes. You're looking for bubbly edges and a light golden color—you'll see the cheese get glossy and start to brown at the edges. This is the magic moment.
- Let it set and cool:
- Five minutes out of the oven is crucial because the cheese needs to firm up enough to hold together. It'll still be warm, which is perfect.
- Add your fillings:
- If you're using mayo and mustard, spread a thin layer inside each warm bun. Add tomato and meat if you like, but keep it minimal so the sandwich stays stable.
- Assemble and serve:
- Carefully press the two buns together with the fillings in between, and eat it while everything is still warm and crispy. The cheese will soften slightly but the pickle keeps it interesting.
 Save
Save The first time I brought these to a potluck, someone asked what kind of diet bread I was using, and when I said it wasn't bread at all, the whole table went quiet before asking for the recipe. That's when I realized this sandwich crosses some invisible line between clever hack and actually incredible food.
Why This Works So Well
Cheese has always been magical when it melts, but layering it with pickles is genius because the acid from the pickles cuts through the richness perfectly. The heat from the oven creates this textural contrast—crispy edges that give way to just-melted center—that keeps you interested with every bite. It's the kind of dish that makes you slow down instead of rushing through lunch.
Flavor Combinations That Work
Once you master the basic version, you can start experimenting without breaking anything. Swiss cheese brings a milder, slightly nutty flavor that's lovely with regular dill pickles, while provolone adds a creamy richness that plays well with spicy pickle varieties. I've even tried a combination of cheddar and gruyère that transformed the whole thing into something you could serve at a dinner party without anyone knowing it started with a jar of pickles.
Storage and Reheating
These are honestly best eaten immediately while everything is warm and the cheese still has that perfect melty quality. If you have leftovers, which is rare, a toaster oven at 350°F for three to four minutes brings back the crispness without drying things out. Cold cheese buns aren't really worth eating, so I usually just make exactly what I'll consume rather than banking on leftovers. If you want to prep ahead, you can assemble the buns and freeze them before baking, then bake straight from frozen for an extra minute or two.
- Reheat in a toaster oven for best results, which restores the crispy texture better than a microwave ever could.
- If you freeze unbaked buns, separate them with parchment so they don't stick together in your freezer.
- Eat them within a day or two of making for the best flavor and texture.
 Save
Save This sandwich taught me that the best recipes often come from constraint rather than planning, and that sometimes the happiest discoveries happen when you stop looking for bread and start imagining what else could take its place. If you try it, I'm genuinely curious whether it becomes a regular in your rotation the way it has in mine.
Recipe FAQs
- → What type of cheese works best for the buns?
Sharp cheddar cheese slices are ideal as they melt well and provide a strong, savory flavor that crisps into a sturdy bun.
- → Can I use different types of pickles?
Long dill pickle slices are preferred for their tangy taste and texture, but spicy or bread-and-butter pickles can add different flavor profiles.
- → How do I prevent the cheese buns from sticking to the baking sheet?
Line the pan with parchment paper or lightly spray with nonstick cooking spray before placing the cheese slices to ensure easy removal.
- → Are there vegetarian or gluten-free options available?
This preparation is naturally gluten-free and vegetarian-friendly, especially when omitting optional deli meats.
- → How long should the cheese buns cool before assembling?
Allow the cheese buns to cool for about 5 minutes until they set and can be handled without breaking.
- → What optional fillings complement the cheese and pickles?
Mayonnaise, Dijon mustard, tomato slices, and deli turkey or ham can be added for extra flavor and substance.